Running Windows 11 on an unsupported or older PC can seem impossible, especially with Microsoft’s new hardware requirements like TPM 2.0, Secure Boot, and modern CPUs. Many people and organizations have perfectly functional computers left behind by these upgrades. The good news? With the right steps, you can create a streamlined, lightweight Windows 11 image and unlock the power of those sidelined devices—all while staying within legal and professional boundaries.
This guide will walk you through everything you need to know: why lightweight Windows 11 images matter, how they work, step-by-step creation instructions, expert advice for organizations, essential legal and practical notes, and answers to top user questions.
Table of Contents
How to Create a Lightweight Windows 11 Image for Unsupported PCs
| Aspect | Details |
|---|---|
| What is it? | Making Windows 11 fit and run well on unsupported or older computers by removing unnecessary components. |
| Main Tool | Tiny11 Builder (open source, community-reviewed). |
| Official Source | Tiny11 Builder GitHub |
| Minimum Specs After Optimization | 2GB RAM, ~8GB free disk space, no TPM/Secure Boot required (for Tiny11 images). |
| Legal Notice | Requires a valid Windows license key; does not provide unauthorized activation. |
| Time Required | 30–60 minutes (typical for Tiny11), longer for major customizations. |
| Professional Value | Enables extended use of legacy hardware, reduces costs, supports e-waste reduction goals, helps IT managers. |
| Supported Windows Builds | Windows 11 22H2 builds (e.g., 22621.525, 22621.1265 as of this writing). |
Creating a lightweight Windows 11 image for unsupported PCs is more than a technical trick—it’s a pathway to sustainability, cost-conscious upgrades, and IT flexibility. This process gives second life to valuable hardware, reduces environmental impact, and keeps users connected to the latest tools—all without misleading shortcuts or legal complications.
By following the step-by-step guide above, you can safely build and install a lightweight Windows 11 tailored to your needs. Whether you’re a tech beginner, educator, or IT pro, your hardware and budget are respected, and your computers are empowered to do more for longer.
Why Creating a Lightweight Windows 11 Image Is Important
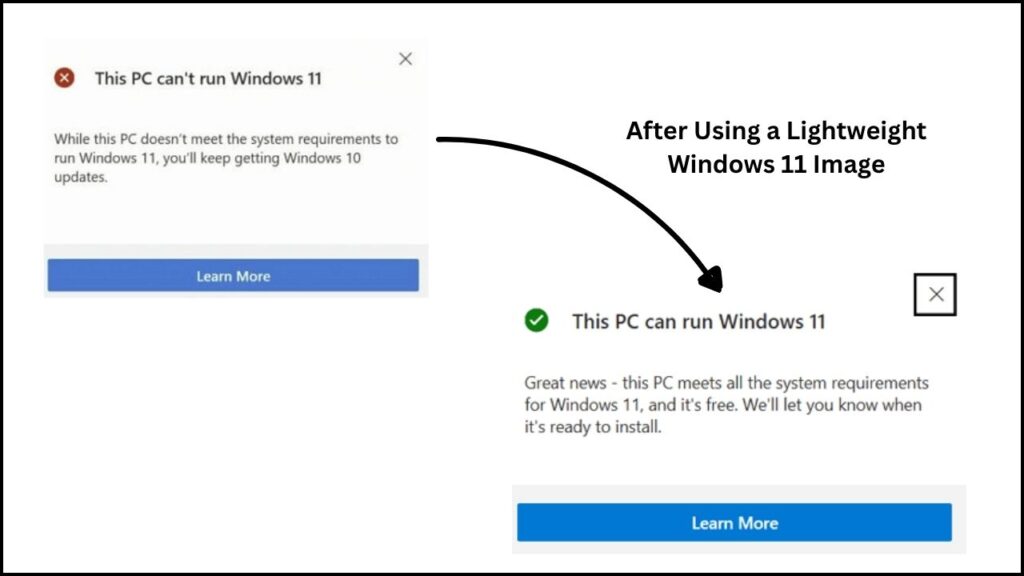
Microsoft’s hardware restrictions, while implemented for better performance and security, left millions of older PCs unsupported. This presents a real challenge for:
- Home users with dependable, older computers
- Schools, nonprofits, and small businesses that lack the budget for fleet-wide upgrades
- IT specialists wanting to optimize deployments and save on hardware costs
- Anyone concerned with reducing e-waste and maximizing ROI
A lightweight Windows 11 image dramatically lowers the overhead. It’s a custom install image where unnecessary features, background services, preinstalled apps, and compatibility blockers are stripped away, making Windows 11 much more manageable for older hardware.
Example:
A non-profit organization in India needed to modernize 40 donated laptops (2013-vintage, 4GB RAM, outdated CPUs) for students. Using a lightweight Windows 11 image, they delivered fast, secure computers—at zero hardware cost and with far less digital waste.
What Is a Lightweight Windows 11 Image?
A lightweight Windows 11 image is a custom-built installer, created from the official ISO file, but stripped of non-essential apps and features. It uses tools and scripts to remove:
- Preloaded apps (games, news, OneDrive, widgets, advertising)
- Unnecessary system services and scheduled tasks
- Hardware checks (bypassing TPM, Secure Boot, etc.)
- Telemetry and certain update features (if desired)
You are left with a clean, efficient version of Windows 11. This means:
- Much less disk space used—8–12 GB vs. 20+ GB for standard installs
- Less demand on RAM and CPU
- Faster boot times
- No forced obsolescence for useful older hardware
Important: You must have a valid Windows license to activate Windows 11. The lightweight image process does not provide free or pirated licenses or keys.
Step-by-Step Guide: Creating a Lightweight Windows 11 Image
This section provides a detailed, beginner-to-pro walkthrough using Tiny11 Builder, the widely trusted method. There are also notes for advanced users and IT professionals.
Step 1: Download the Official Windows 11 ISO
- Visit Microsoft’s Download Windows 11 page (always use the official page!).
- Select “Download Windows 11 Disk Image (ISO)” for x64 devices.
- Choose the edition (usually Windows 11, multi-edition ISO), and language.
- Save the downloaded file to your PC, ideally on a fast internal drive.
Why this matters: Using the genuine Microsoft ISO ensures no malware, fake files, or license issues.
Step 2: Download the Tiny11 Builder Tool
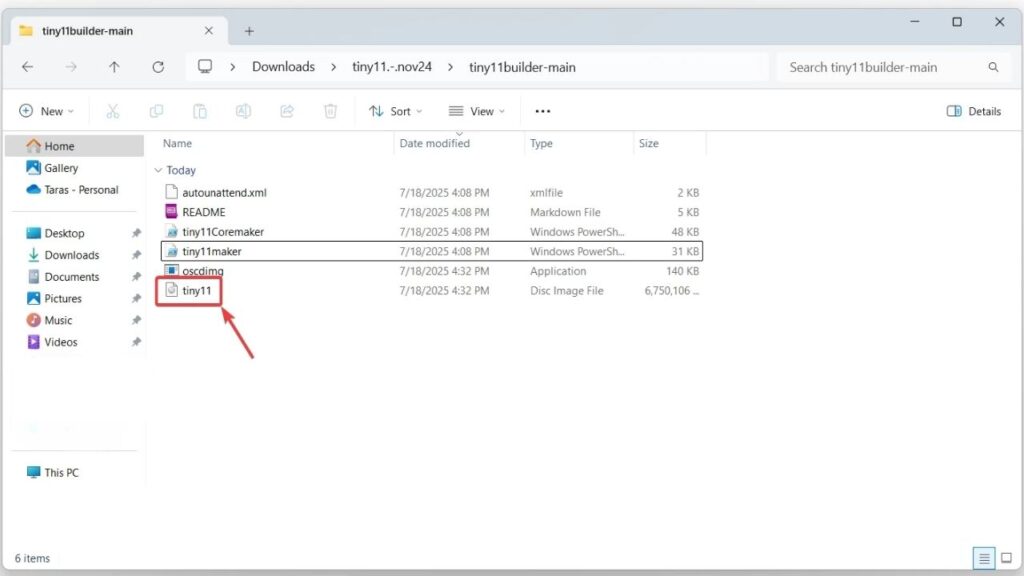
- Go to the Tiny11 Builder GitHub repository—always verify it’s the official repository by checking update activity, readme, and community comments.
- Download the ZIP archive or script files for the latest version.
- Extract the files to a folder on your computer (e.g.,
C:\Tiny11).
Note for IT professionals: Other tools exist for deeper customization, such as MSMG Toolkit and NTLite. However, Tiny11 Builder provides a safe, community-supported balance of features and ease-of-use.
Step 3: Prepare Your Workspace
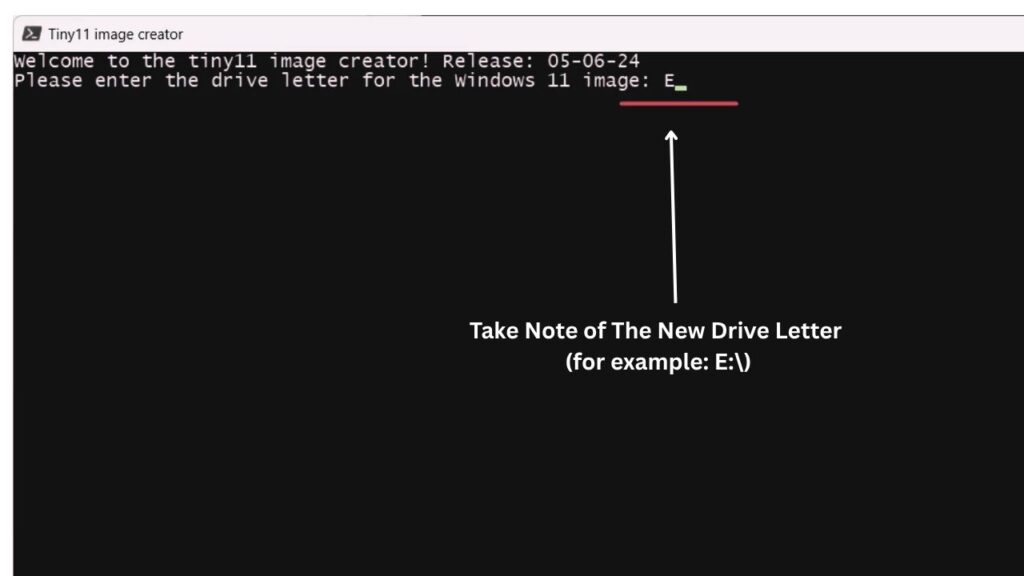
- Mount the ISO: Right-click the Windows 11 ISO file and select Mount. Take note of the new drive letter (for example:
E:\). - Open a Command Window: Launch Windows Terminal or PowerShell as Administrator.
- Set Execution Policy: For the script to work, allow PowerShell to run unsigned scripts temporarily. In the terminal, type:text
Set-ExecutionPolicy Unrestrictedand confirm.
Security Tip: You can set this back to “Restricted” after finishing.
Step 4: Run the Tiny11 Builder Script
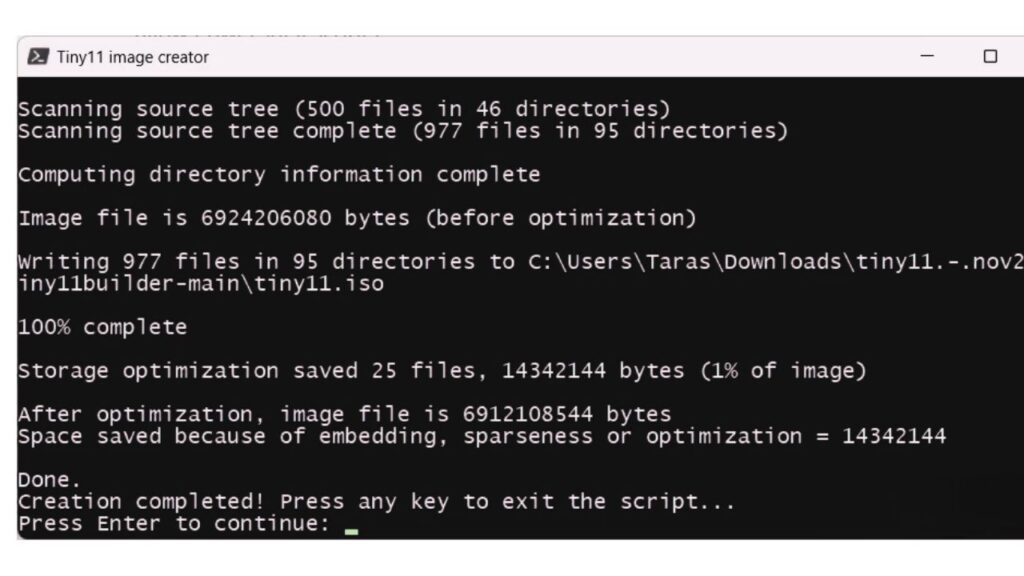
- In your administrator terminal, drag and drop the
tiny11makerscript file, or execute it from its folder. - When prompted, enter the drive letter of your mounted Windows 11 ISO.
- Choose the Windows edition (Home, Pro, etc.) as required.
- Select the correct image index (the script will display the available options).
The script now works to:
- Strip unneeded apps and features
- Remove hardware restrictions (makes Windows 11 installable on older PCs)
- Reduce system footprint
Typical time: 20–40 minutes, depending on system speed. Your new ISO file will appear in the tool’s folder when complete.
Step 5: Create a Bootable USB Drive
- Insert a high-quality USB stick (at least 8GB).
- Download and open Rufus (reputable, free, from official site).
- Select the new, lightweight ISO as the source.
- Click START and let Rufus create a bootable USB with your customized Windows 11 image.
Why this step matters: A clean, bootable USB is necessary to install Windows 11 on your target machine.
Step 6: Install Windows 11 on Your Unsupported PC
- Plug the USB stick into your old or unsupported computer.
- Turn on the computer; hit the boot menu key (usually F12, F10, or Esc) to boot from the USB.
- Start the Windows 11 installation as normal.
- Enter your license key when prompted.
Pro IT Tip: For labs, classrooms, or bulk deployments, make a reference install and use Windows’ “Sysprep” to clone images for multiple PCs.
Advanced Customization for Professionals
While Tiny11 Builder covers most needs, you may want tailor-made behavior for particular applications (kiosks, embedded devices, remote stations):
- MSMG Toolkit: Allows removal of specific Windows features and deeper system tweaks.
- NTLite: Offers a graphical user interface for building custom Windows images, integrating drivers, and adding updates.
- Post-Install Scripts: Use Win11Debloat or Bloatynosy for further fine-tuning after installation.
Note: Advanced methods may require more time, technical skill, and testing to ensure update compatibility and security.
Practical Advice, Safety, and Best Practices
Security First:
- Always scan any downloaded script or tool with trusted antivirus software.
- Only use tools from official repositories with active community oversight.
Licensing and Updates:
- You must own or buy a legitimate Windows activation key.
- The standard Tiny11 build supports Windows Update. “Core” or extra-minimal variants may disable updates—choose wisely for your situation.
Testing:
- Try your image on a spare device before deploying broadly.
- Keep a recovery USB or backup ready in case of problems.
Professional Benefits:
- IT managers can prolong hardware lifespans and reduce costs.
- Schools and NGOs can provide modern software on existing fleets, keeping e-waste out of landfills.
- Home users keep older laptops and desktops productive at no extra hardware expense.
Microsoft Edge Gets Lightning-Fast Speed Boost—Here’s How It Beats Chrome Now
Microsoft Quietly Removes Key Password Management Feature, Sparking User Concerns
FAQs About How to Create a Lightweight Windows 11 Image for Unsupported PCs
1. Is this process legal?
Yes, customizing a Windows install image for your own or organizational use is allowed. However, you must activate Windows 11 with a valid key. No part of this process enables illegal software use.
2. Does a lightweight image perform as well as standard Windows 11?
Performance on older PCs is usually noticeably better: less resource use, fewer background tasks, and quicker boot times. Some advanced features or apps may be missing, depending on what’s removed.
3. Can Windows Update work on a lightweight Windows 11?
Yes—if you use the “standard” image created by Tiny11 Builder. Ultra-minimal images may not support all update features.
4. What if I need to return my PC to how it was pre-install?
Have a full backup of your original data and operating system. You can always restore from a recovery drive or reinstall another OS (including the official Windows 11 or Windows 10).
5. What if my old PC still doesn’t work after using Tiny11?
Some very old hardware may lack compatible drivers, or be too old for core Windows 11 services regardless of bloat. In such rare cases, consider lightweight Linux alternatives.
Expert Use Cases & Real-World Benefits
- Schools: Deployed lightweight Windows 11 to hundreds of older laptops, saving over ₹10 lakh in hardware costs and reducing annual e-waste.
- Small Businesses: Revamped office PCs allow modern Office 365 apps and Teams without lag or constant freezes.
- Medical Clinics: Old reception computers got a new lease on life, ensuring HIPAA compliance with updated OS security patches.
In each scenario, users benefit from improved speed, modern features, and enhanced device longevity, all while keeping costs low and supporting the environment.
